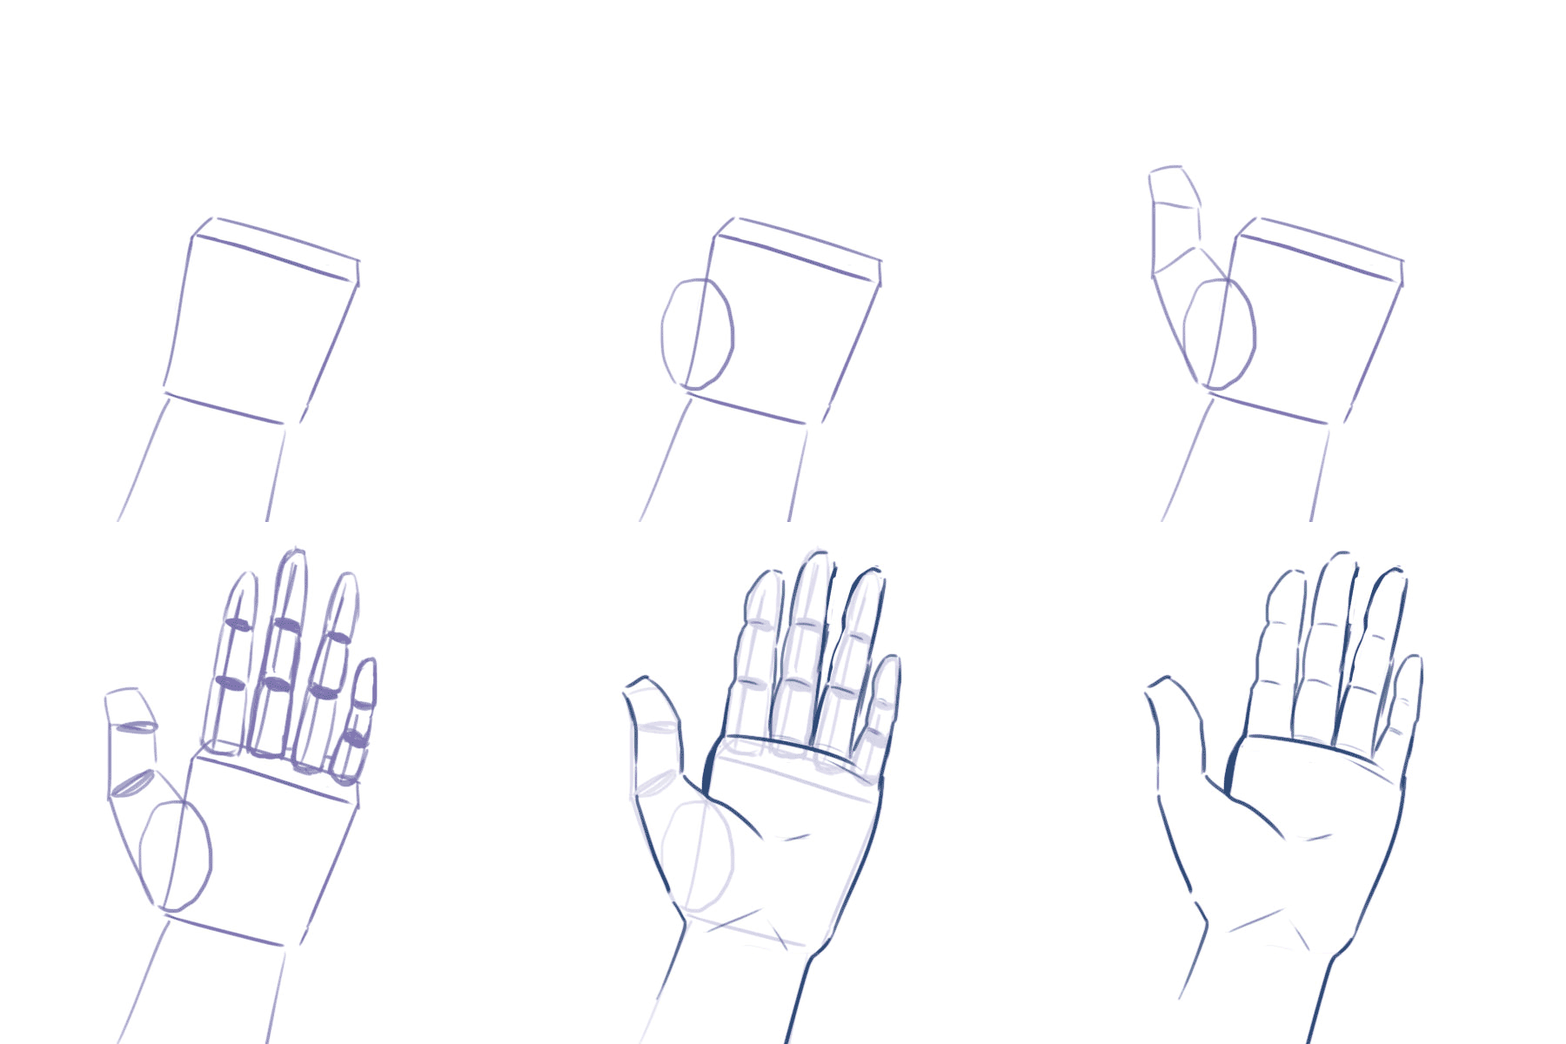

First, we will draw the palm of the hand as a rectangle.

Next you have to draw an oval, which represents whe base of the thumb

Next, we will draw the thumb outline, its general form

You can draw the fingers at this stage just as lines, this way you can position them best and decide their length easily. Notice how the fingers form and arc.
Don't draw all the fingers with the same length!

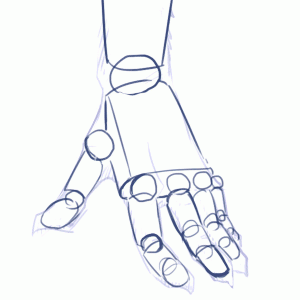
We will use the same geometric shapes we have, and we will draw each portions of the fingers as little cylinders, take in consideration that the fingers get less wide.

Now let's finish this, we will use this base structure to draw the final hand, be sure to place the skin folds where the hands articulates in the flexible portions of the hand!

This is the final result you should get, a pretty decent hand in general.

Let's watch this in an animated process.


In general, the previous structure is very useful to draw the hand in different positions, the hand always have the same elements, just by practicing will allow you to get better results, remember to see references like photos or other drawings to get examples of the hand-position you want to draw.


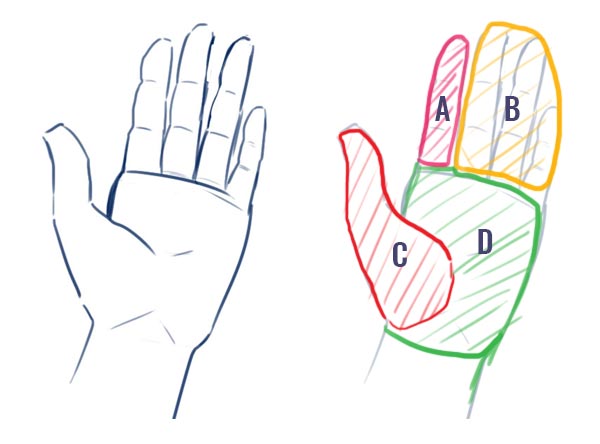
Hands are a complex structure, which always have the same divisions.

Considering the zones or pieces called A, B,C and D you can draw hands in different positions.
Zone D, always draw zone D first, this is the mother point where all of the other zones are positioned!
Zone A, represents the index finger, this finger behaves sort of independent from the rest, we use it to press buttons, press triggers or point at things, because of that, figuring out the position of this finger will make easier to us draw the rest of the hand.
Zona B, represent the rest of the fingers minus the index, all of these usually are positioned in a similar way.
Zona C, represent the thumb, the other finger that is moves independently, it's important to locate it correctly with the index finger.


These are some examples of the previously seen structure, try to imagine the zones A,B,C and D used.

A mix of methods, most of the time you will use the basic method to draw the more complex hand positions.
in general, the anthro/furry hands have the same structure but you vary the width of the fingers (usually wider)
This is all I have to say for now, I hope it's useful for you, if you like it, please share it in your social networks!

Deja de ser tan geniaaal! este tutorial es realmente bueno ¿por qué no lo explican así en los libros?